Bottoms up
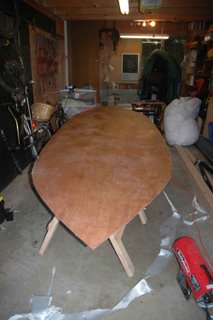
Managed to find some time this weekend to work around fishing trips so I could get the bottom installed. Friday, I cut out the bottom - not a simple task with a circular saw that does not have a depth adjustment! The bottom turned out a little ragged but it's not going to pose much of an issue.
I decided to pre-glass the inside bottom before installing it and laid down 2 layers of 7.5 oz glass - I'm leaving the flow coats until later.

Having let the glass dry until no longer tacky, I dry-fitted the bottom to double check the dimensions. After a bit of jiggling, I got it pretty well fitted. I really hope that everything is nice and symetrical (or at least close enough)! Getting everything perfect is something I think I just need to let go of a bit...
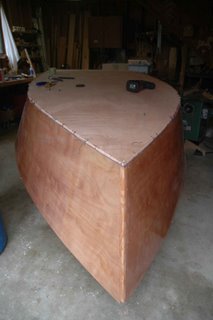
Having got the bottom lying how I wanted, I stitched it in place with bailing wire. I had been planning on screwing it to the strongback stations but found that stitching was just easier overall.

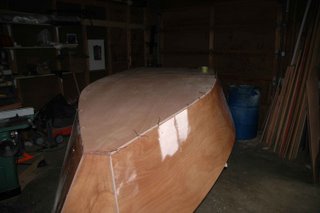
That done, from the inside I worked thickened epoxy into the angled gap between sides and bottom. The plans I'm using had said to plane the sides flush but Bob convinced me that leaving the gap would result in more epoxy and a stronger bond - I was convinced and landed up doing it this way. Pre-epoxying a bead along the sides and dropping the bottom down onto it would have been damn difficult without creating a glue debacle!

Hey this thing may even float right now!

I decided to pre-glass the inside bottom before installing it and laid down 2 layers of 7.5 oz glass - I'm leaving the flow coats until later.

Having let the glass dry until no longer tacky, I dry-fitted the bottom to double check the dimensions. After a bit of jiggling, I got it pretty well fitted. I really hope that everything is nice and symetrical (or at least close enough)! Getting everything perfect is something I think I just need to let go of a bit...
Having got the bottom lying how I wanted, I stitched it in place with bailing wire. I had been planning on screwing it to the strongback stations but found that stitching was just easier overall.

That done, from the inside I worked thickened epoxy into the angled gap between sides and bottom. The plans I'm using had said to plane the sides flush but Bob convinced me that leaving the gap would result in more epoxy and a stronger bond - I was convinced and landed up doing it this way. Pre-epoxying a bead along the sides and dropping the bottom down onto it would have been damn difficult without creating a glue debacle!

Hey this thing may even float right now!


0 Comments:
Post a Comment
<< Home